Amarok/Archives/Amarok 1.4/User Guide/UsingAmarok
Equalizer
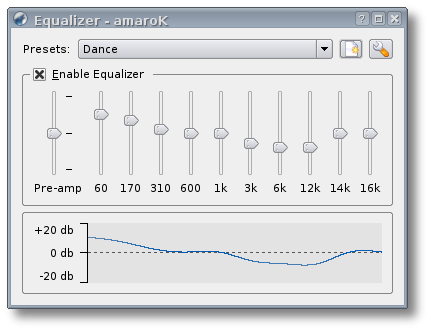
The built in equalizer is easy to use and works with all engines. There are 17 built in presets ranging from Classical to Techno and you can easily create your own.
To access the equalizer from the main window choose Tools > Equalizer. From the Player window click the EQ button. Check the Enable Equalizer check box to activate the equalizer.
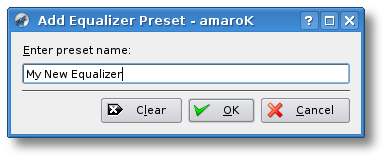
Use the drop down box to pick one of the built in presets. Moving a slider will automatically switch to the Manual preset. Experiment with the sliders until you find a combination you like then click Add New Preset icon to the right of the drop down list. If you change to another preset without saving your changes they will be lost.
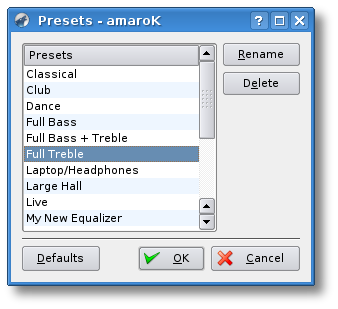
Click the Manage presets icon to the right of the drop down list to Delete or Rename a preset.
Sidebar browsers
Browsers in amaroK allow you to acess your music collection in several different ways. They are situated on the left side of the window, and each one is represented by a tab with name written on it. Click on any tab to bring the selected browser into view. Clicking on the active tab will contract the Browser so only the tabs are showing. One Browser is visible at any time, although you can drag tracks from one tab to another by hovering on the target tab for 1 second until that tab becomes visible. If you want to reduce screen usage, or if you're just not using some of the available browsers, you can hide them by right-clicking on any Browser tab and toggling those desired on the context menu.
Context browser
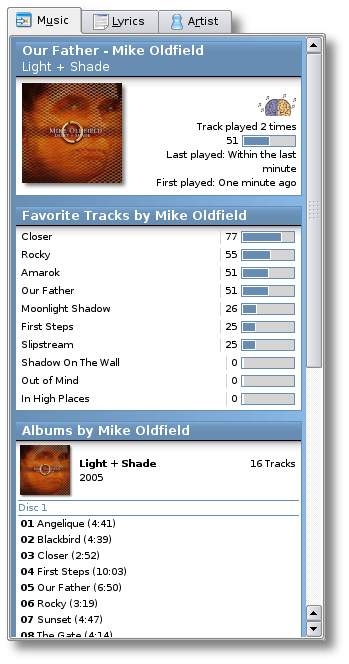
The Context Browser shows information about the currently playing track. Its appearance can be modified by using amaroK themes. The Context Browser consists of three tabs: "Music", "Lyrics", and "Artist". Note: users of previous amaroK versions will notice there is no longer a "Home" tab - the information from this tab has been redistributed throughout the amaroK interface, mainly onto the Statistics dialog, accessible through the Tools menu.
Music tab
The Music tab shows various pieces of information, such as: albums cover image, tracks rating and score, related artists, suggested songs, and lots of information related to currently played artist.
You can adjust the amount of shown information by right-clicking anywhere on Music tab and toggling items on the context menu.
Lyrics tab
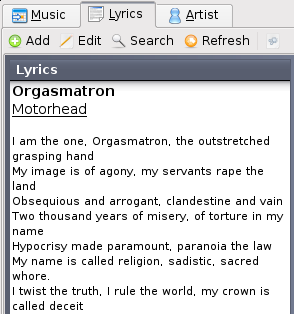
Lyrics tabs fetches lyrics for the currently played song from one of the supported websites. This feature is flexible, and it's possible to write scripts to fetch lyrics from different sites. See Chapter on Script-Writing. When you click on the Lyrics tab, amaroK attempts to fetch lyrics for the current track. If there is no lyrics script running you will be given instructions on selecting one.
You can perform various actions on the lyrics tab, using toolbar buttons:
- "Add" - opens (in an external browser) the "Add Lyrics" page on the lyrics website, depending on which script you're running.
- "Edit" - edit lyrics for the current track, to be stored in amaroK's collection database. Does not require lyrics script to be active.
- "Search" - launches a google.com search (in an external browser) for the lyrics of that track.
- "Refresh" - clear cached lyrics for current track, and search again.
- "Open in external browser" - displays displays the current track's lyrics in your external browser.
Artist tab
The Artist tab shows Wikipedia article about currently played artist. Toolbar contains:
- navigational buttons for moving forward/backward
- page buttons for jumping to artist/album/track page,
- button for opening current page in external browser
- configuration button for setting Wikipedia locale
Collection browser
The Collection browser is the heart of amaroK - this is where your entire collection is viewable, sorted using various groupings. Within each grouping, everything is always alphabetical, symbols and numbers first, and case insensitive. In every grouping method, tracks that have unknown artists and/or albums are always grouped at the start of your collection, under "Unknown". Although track numbers aren't shown, tracks are listed in their album order. Clicking the header of the collection list reverses the sort order. Left-clicking on the triangle to the left of any entry in your collection will expand that entry
The "Group By" pull-down menu allows you to group your collection in several ways:
- Artist - Top level sort only, every track is grouped under its artist, with no consideration given to albums or genres.
- Artist/Album (default) - tracks are sorted into artists, and beneath this, sorted by album. If you want to see Various Artist compilation albums, this is the best way to view your collection - these albums are grouped together at the very end of your list, under "Various Artists".
- Artist/Year-Album - Sorts by artist, with albums in descending order of year (most recent first). If there is no "Year" tag set for a track, it will display "0 - album name".
- Album - Every album in your collection is displayed alphabetically, regardless of artist.
- Genre/Artist - Tracks are grouped according to their genre tag, then by artist, as for the "Artist" group method.
- Genre/Artist/Album - Same as above, only with tracks sorted by album, below each artist.
The remaining items on the pulldown menu allow you to customise the grouping with any combination of the above.
The next two icons on the toolbar change the way your collection is viewed. The first, Tree View, is the default view, and the one you'll probably see the most. The next button enables Flat View, which at first appears empty. Typing search terms in the text entry box immediately below the toolbar will begin to populate your collection, which can be sorted in a variety of ways, by left-clicking on the column headers. right-clicking on the column headers will pop up a context menu allowing you to change the columns shown.
The last icon in the toolbar lets you change your collection setup. Note that if you change any folders, amaroK will automatically rescan your collection - this may take quite some time if you have many tracks.
Immediately below the toolbar is a search filter, which behaves the same in both Flat and Tree views. See the Playlist section of the handbook for more details on searching techniques.
Below the Search Filter, another pull-down menu lets you see the most recently added tracks to your collection. Several time periods are available, ranging from the last 24 hours, to 1 year, or your entire collection.
Right Mouse Button Menu
- Load - Clears the current playlist and adds selected track(s) as first track(s), in sort order.
- Append to Playlist - (also on double-click for single track only) Adds selected track(s) to end of current playlist.
- Queue Tracks - Adds the selected track(s) to the queue to be next played, regardless of how many tracks in the playlist.
- Save as Playlist - (not individual tracks) Save the selected tracks as a playlist. You'll be prompted for playlist name.
- Add to Media Device Transfer Queue - Adds track(s) to a queue, ready to be transferred to a media device, when such a device is attached. See "Media Devices" section for more detail.
- Burn All Tracks By This Artist/Burn To CD - Sends track(s) to K3b (if K3b is not installed, this option is greyed out) for burning as either a data or Audio CD.
- Fetch Cover Image - (album only) Searches amazon.com for a cover image for this album.
- Edit Information for (n) Tracks - Opens the Track Information dialog and allows you to change tags for one or more tracks. See Editing Tags section for more information.
- Manage Files
- Organize (n) Files - Opens Organize Collection Files dialog. See File Organization section for more information.
- Delete (n) Files - Pops up a confirmation dialog asking whether you want to permanently delete the selected track(s) from your hard drive.
- Mark As Compilation - (album only) Sets the selected album as a compilation album, to be listed under "Various Artists"
- Unmark As Compilation - (album only) Changes an album marked as a compilation to a normal album, and moves the listing from "Various Artists", to back under the artists listed.
Playlists browser
The Playlist Browser is where all your different playlists are organized.
The Playlist Browser is divided into five sections, each handling a different type of playlist.
Playlists
This is where all your custom playlists are stored. You can view the tracks contained in a playlist by using the expansion arrow to the left of each one. New tracks can be added to any of these playlists by dragging from your current playlist or from the Collection Browser and dropping them on a playlist. To load a playlist (replacing any tracks in your current playlist), you can double-click on it or press the Spacebar when the playlist is selected. Right-clicking on the playlist offers further options.
- Load - Replaces current playlist with contents of selected playlist.
- Append to Playlist - Adds contents of the selected playlist to the end of the current playlist.
- Add to Media Device Transfer Queue - Adds the contents of the selected playlist to a queue of tracks to be transferred to a media device at a later time.
- Rename - give the selected playlist a new name
- Delete - Deletes the playlist from your hard drive. Note, this does not delete the actual tracks, only the playlist file.
Tip
When you save a new playlist from the Playlist Window it is automatically added to the Playlist section.
Smart Playlists
Smart Playlists are special playlists, the contents of which are generated from specific rules when loaded. amaroK is distributed with a selection of predefined smart playlists as follows:
- 50 Random Tracks - contains 50 tracks chosen at random from your entire collection.
- All Collection - all the tracks that are in your collection.
- Ever Played - every track in your collection that has a playcount of at least one.
- Favorite Tracks - individual playlists containing the fifteen highest rated tracks for each artist.
- Genres - individual playlists for each genre represented in your collection.
- Last Played - the fifteen most recently played tracks in your collection.
- Most Played - individual playlists of the fifteen most played tracks by each artitst.
- Never Played - all the tracks in your collection that have a playcount of zero.
- Newest Tracks - individual playlists containing the fifteen most recently added tracks for each artitst.
- Custom Smart Playlists may also be created, based on a wide range of criteria. Right-click on the Smart Playlist heading and select "New Smart Playlist..." from the context menu to open the "Create Smart Playlist" dialog.
(screenshot of 'create smart playlist' dialog)
- Playlist Name - Give your Smart Playlist a meaningful and unique name.
- Match the following conditions - When more than one condition is specified, you have the option of a track having to meet all of the conditions in order to be added to the playlist, or any of the conditions. Most of the time you will want this box to be checked, but you may want to create smart playlists that include the entire collection, but are expanded (see below) in a specific way.
- Order by - When checked, allows you to modify the way your smart playlist is sorted. Note you can select "Random" here.
- Limit to - Checking this box and setting a value will keep your Smart Playlist to a manageable size. Particularly useful when you have conditions that return a large number of results.
- Expand by - Checking this box and setting a value allows you to create a smart playlist which contains subgroups - such as the Genres smart playlist.
Dynamic Playlists
See section on Dynamic Playlists
Radio Streams
Podcasts
See Podcast Section

