KEcoLab/User Docs/User Guide
Introduction
Welcome to KEcoLab’s User Guide!
KEcoLab project aims to provide a streamlined process for measuring software energy consumption remotely using a CI/CD pipeline. By automating the measurement process and integrating with the OSCAR tool, users can make informed decisions to improve code efficiency and obtain software eco-certification with the Blue Angel. Check out our handbook to know more about Blue Angel certification.
Getting Started
This guide will provide you with step-by-step instructions on how you can measure your software’s energy consumption through KEcoLab.
If you have any trouble while performing any of the below steps, refer to this tutorial video for help:
[Video Tutorial Will be Placed Here]
Let’s start with preparing the necessary documentation for energy measurements.
Pre-requisites
Before measuring your software’s energy consumption, make sure to prepare usage scenario script for the software.
Usage Scenario Scripts
Usage scenario scripts are a set of shell command files designed to measure the energy and hardware consumption of software across different operational modes: idle, baseline and sus.
During the idle mode your software will be opened but no action is performed, in baseline mode only operating system will be running, and in SUS mode your software will be opened and perform certain actions.
You need to prepare three files written in shell commands: idle.sh, baseline.sh, and sus.sh. Additionally, if you want to write any configurations for the software, you can add that in configuration.sh and attach with other files.
If you need guidelines on creating these scripts, you can refer to the **Usage Scenario Script** page.
Usage
In this section, you will execute and measure the energy consumption for your software.
Create a Fork
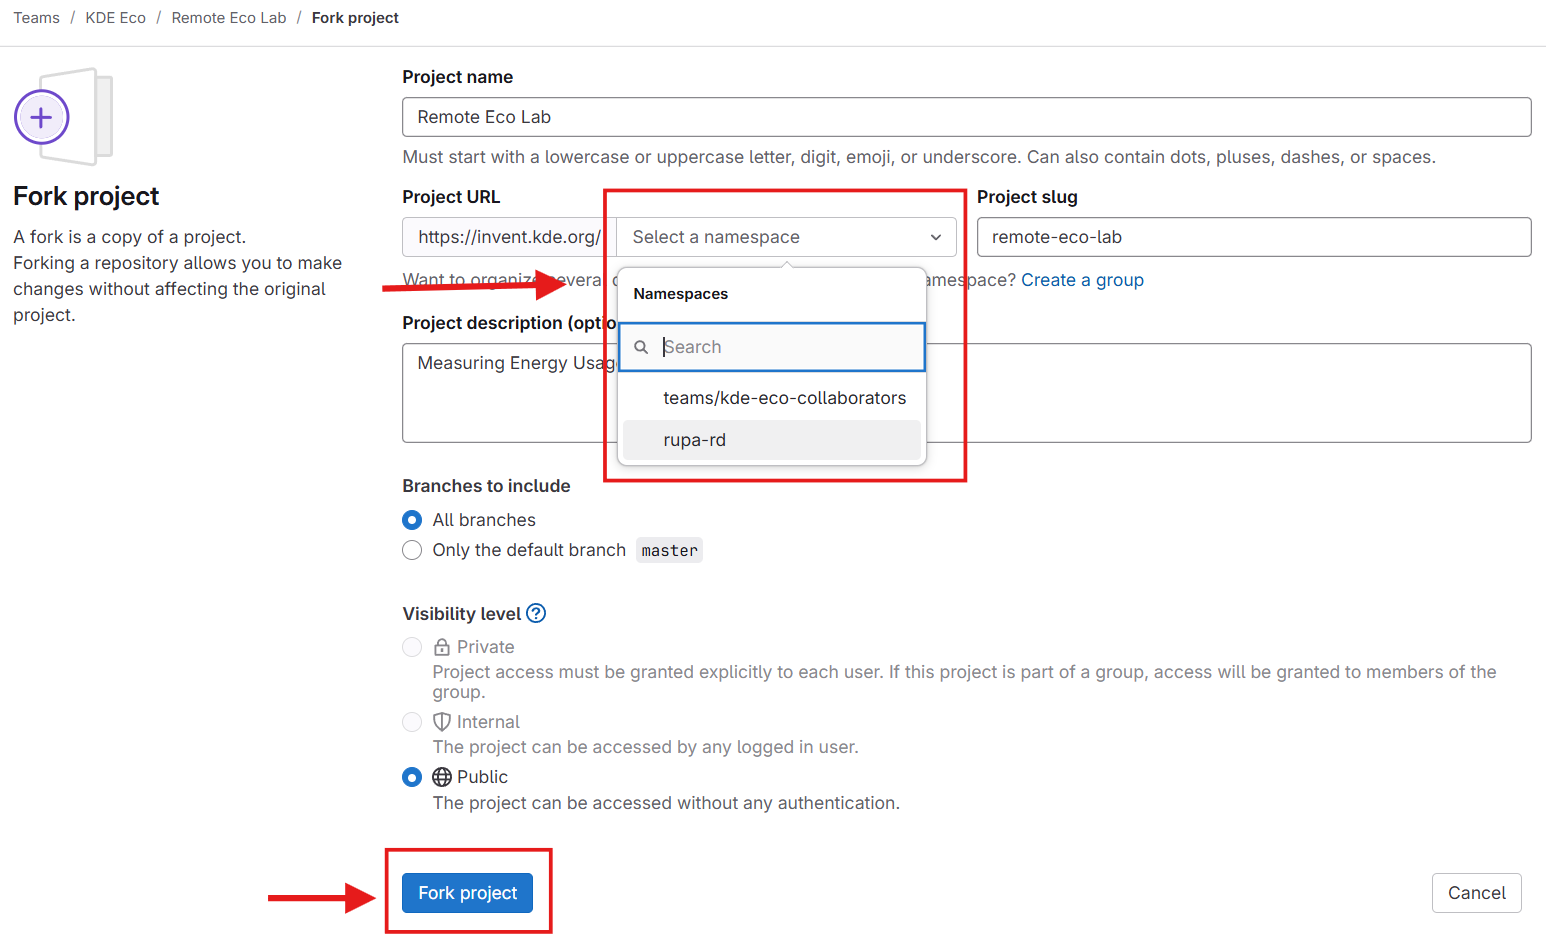
As a first step, you need to fork the KEcoLab repository. Navigate to this link and click the Fork button in the right corner.

Do not change the project name and project slug. Under the select a namespace, select your username and click create fork.
You can either use WebIDE or your local machine.
Using Local Machine
If you choose to use your local machine, click code > copy the link under clone with HTTPS.
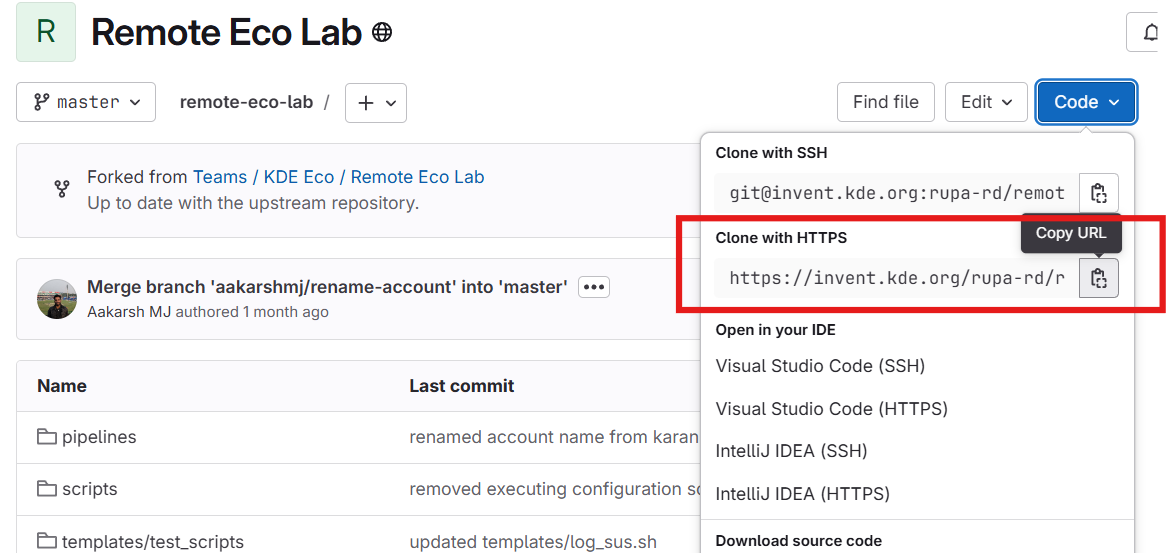
Open a terminal on your local machine and copy and paste the command below to clone the repository on your local machine. Replace the <copied_link> with the actual link you copied before.
git clone <copied_link>

The next step is to create a new branch for your software. Copy the command below to create a new branch and replace <branch_name> with your software name. Eg: org.kde.kate, org.kde.okular.
git checkout <branch_name>

Using WebIDE
Click edit fork in WebIDE which is present next to the code.

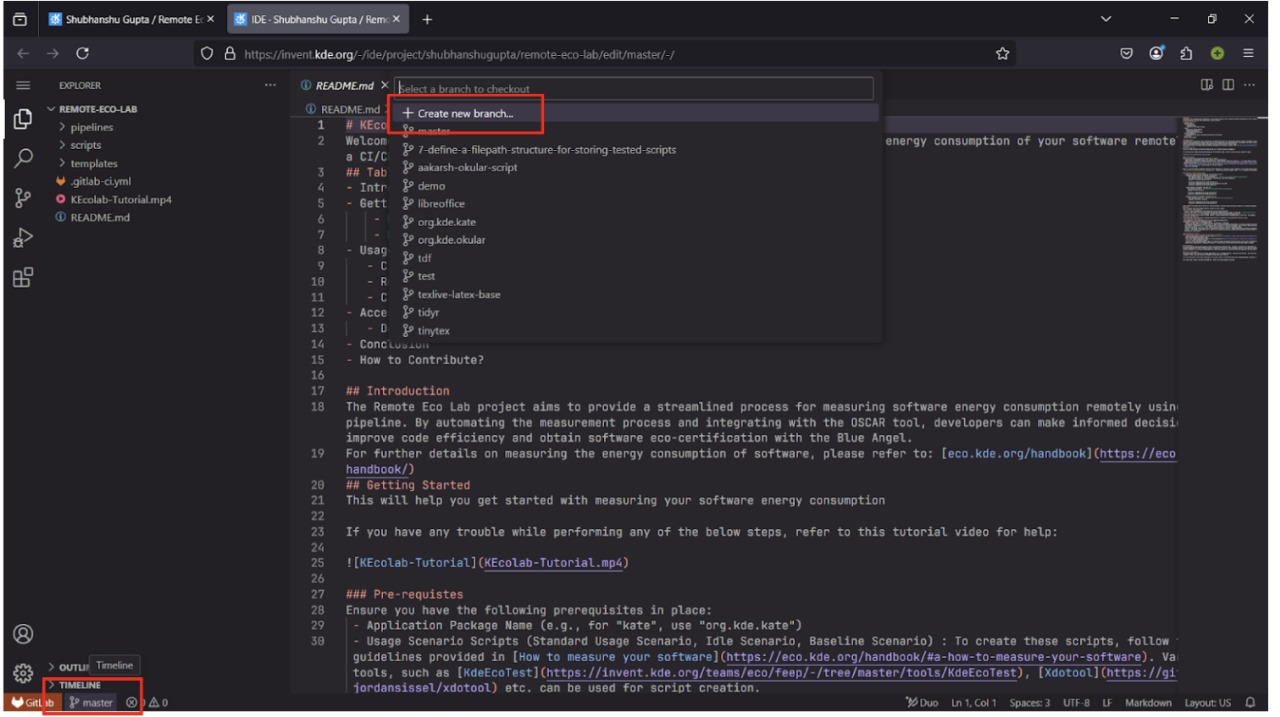
Once the IDE is opened, click master in the bottom left corner of the IDE and choose create new branch.
Provide a name to the new branch (prefavorably the name of the software) and enter. You will switch to the new branch. Eg: org.kde.kate, org.kde.okular.
Upload files
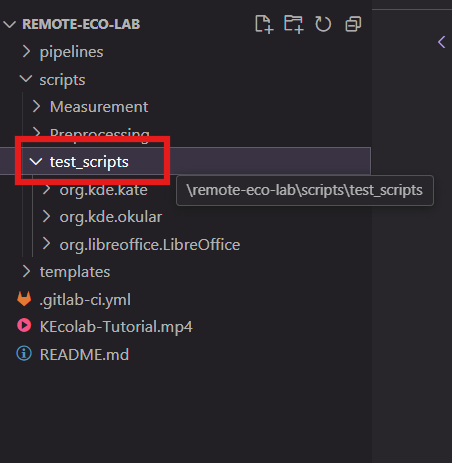
The next step is to organize the scripts you created and add them to a folder. Navigate to this location: scripts > test_scripts. Inside the test_scripts folder, create a new folder for your software.
The name of the folder should be strictly in this format only: org.kde.kate'
Replace kate with your software name and upload all the scripts (i.e., baseline.sh, idle.sh, sus.sh and configuration.sh).
Push Changes
After uploading the files, create a commit with a message. Follow the instructions below to create a commit.
Using Local Machine
Before committing your changes, you need to stage the changes using the git command
git add .
This will add all the unstaged files.
To create a commit on your local machine, paste the below command in your terminal. Replace <software_name> with your software name.
git commit -m “Uploaded files for <software_name> energy measurement.”

Once you committed the changes in your local machine, it’s time to push the changes to the forked repository. Paste the command in your terminal and do not forget to replace `<branch_name>` with your new branch name.
git push origin <branch_name>

Using WebIDE
To stage the changes in WebIDE, go to source control that is present in the left navbar.
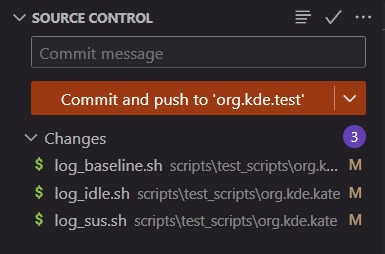
Enter a commit message similar to this '‘Uploaded files for kate software energy measurement’' and click commit and push to new_branch button. This will push the changes to your new branch you created.

Create a merge request
After pushing the changes to the new branch, go to the forked repository page. You will see a notification to create a merge request. Click create merge request button.

Add the title of the merge request similar to the folder name you created i.e., if the folder name is ‘org.kde.kate’ then the title of the merge request is also ‘org.kde.kate’. Failing to do so, you will encounter errors in the measurement process.
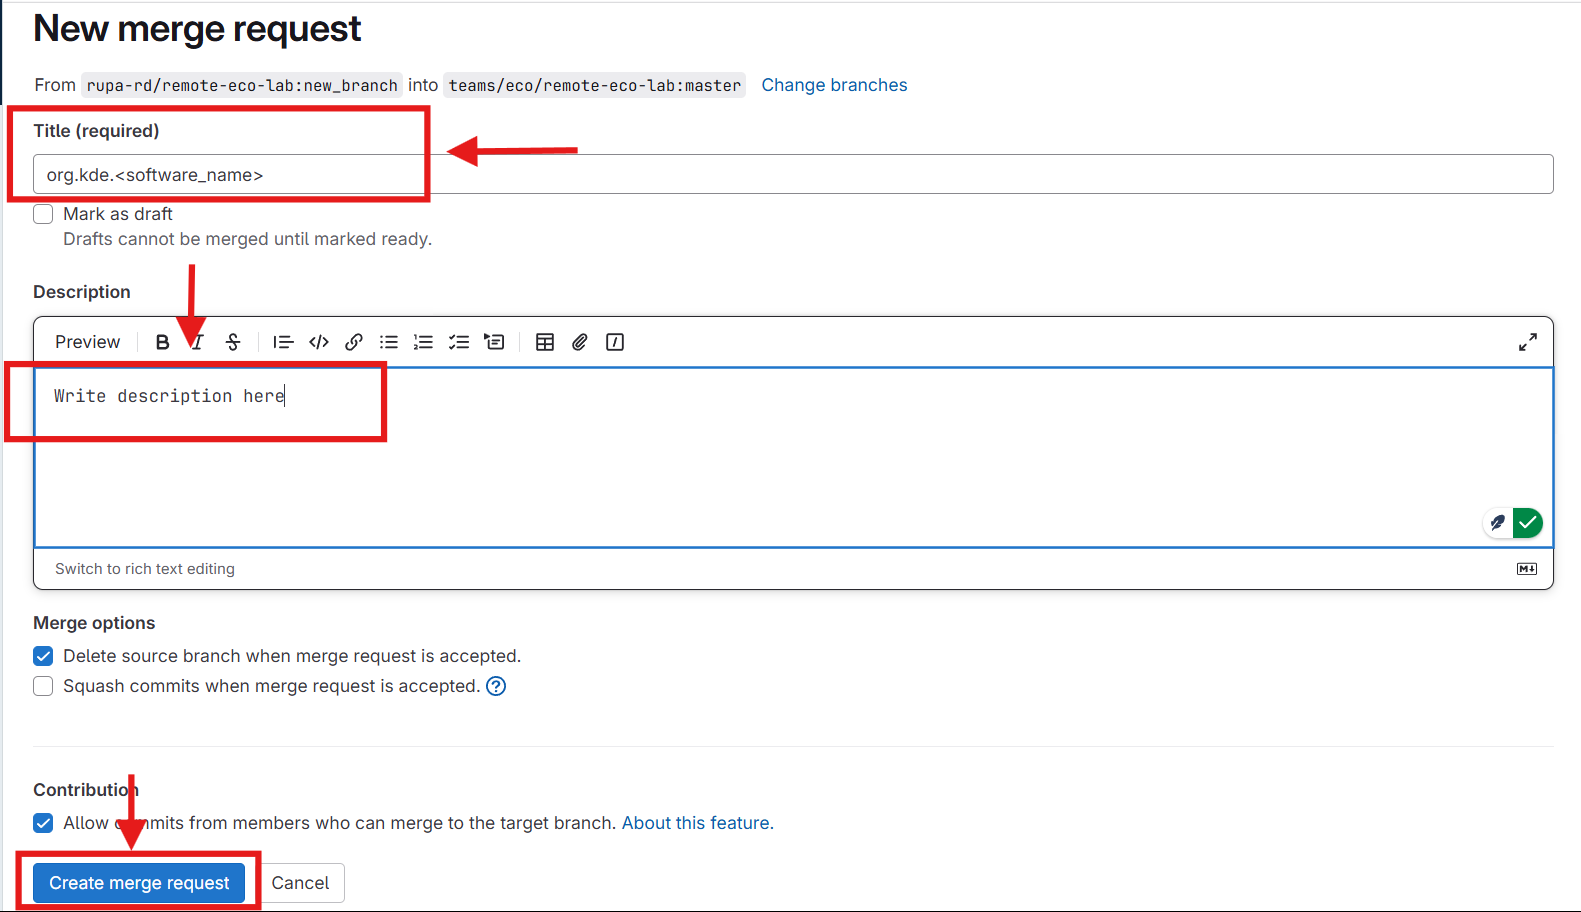
Review and Approval
After creating a merge request, wait for some time to review the merge request before running the measurement process. During this step, if you made any error creating a folder, uploading files or any errors in the usage scenario script will be notified.
CI/CD pipeline execution
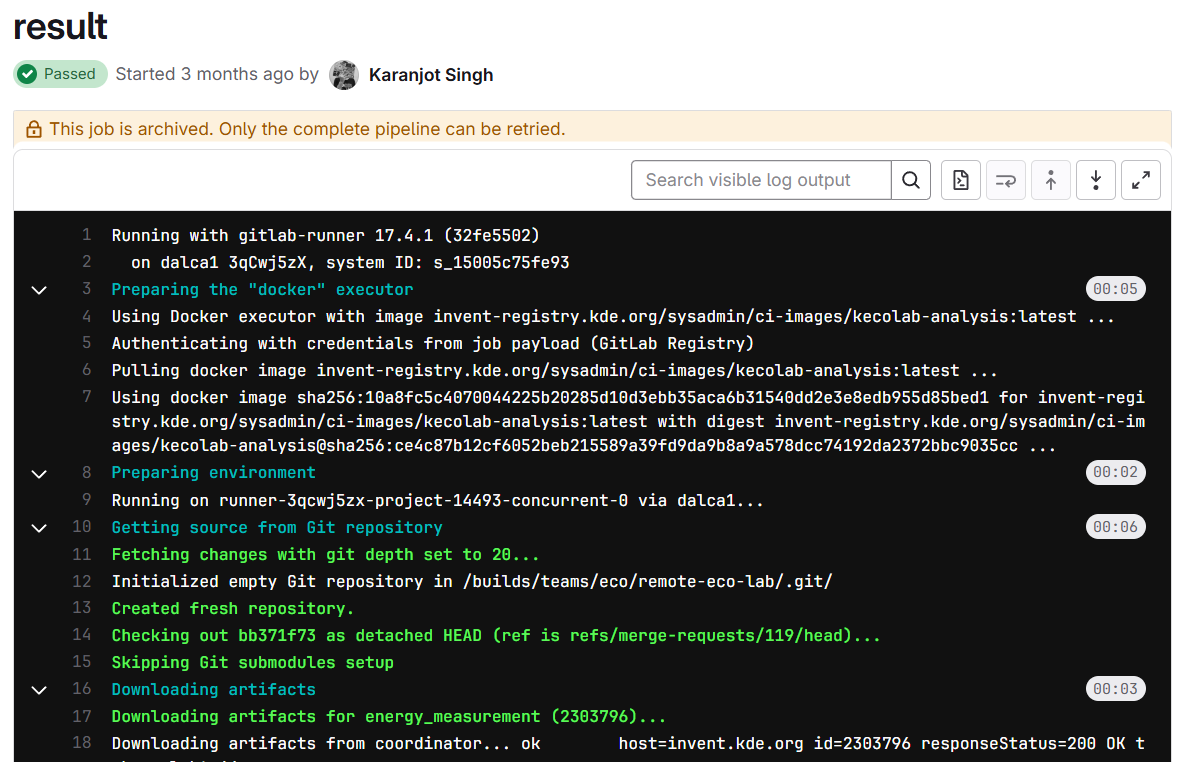
The next step is pipeline execution. Successfully creating a merge request will trigger the pipeline defined for measuring the energy consumption of a software. During the execution of the pipeline, three jobs will run.

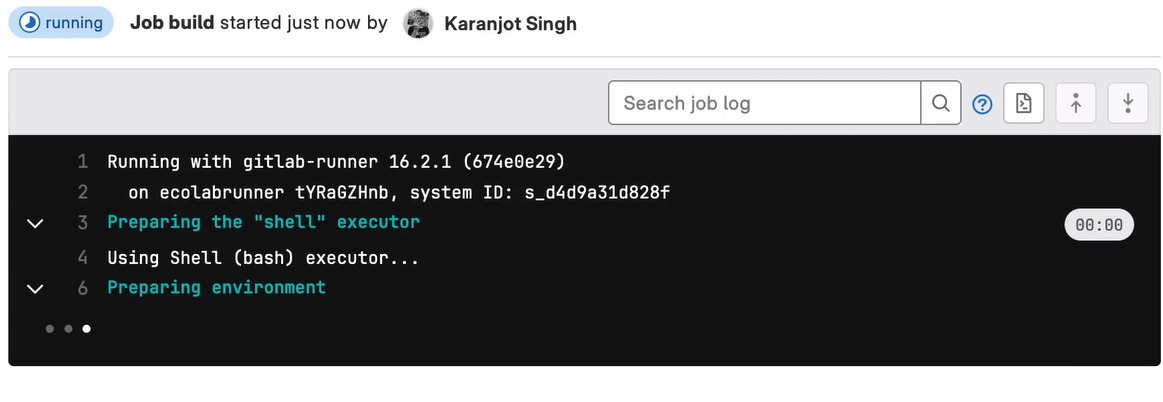
The first job is build. In the build job process, the pipeline will define and prepare all the necessary files and environments required for the measurement process.
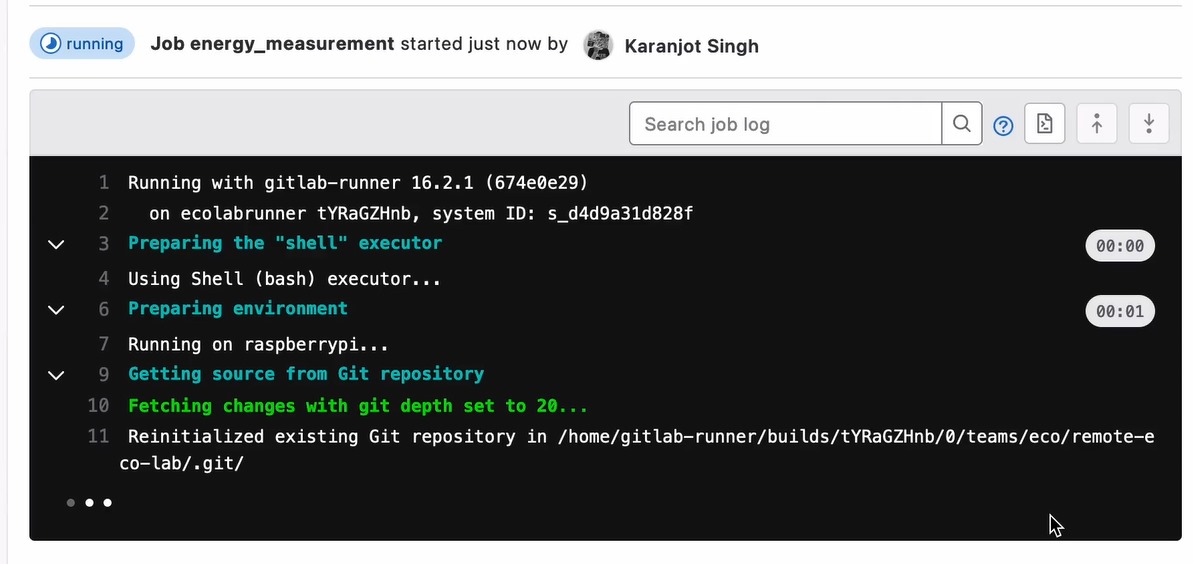
The second job is measurement. In this job, the actual measurement of the energy consumption will take place. The measurement process will execute for each mode of the software, i.e., idle, baseline, and sus. The measurement will approximately execute for 30 iterations to get the most accurate results for each mode.
The last job is result. During this job, the results will be generated in the pdf format with the help of the R script and Oscular we defined already.
Access the result
Upon successfully executing all the jobs, you can download the results it generated.
Downloading Artifacts and Reports
As a result of the pipeline, you will be able to download the artifacts and reports from the merge request page you created.
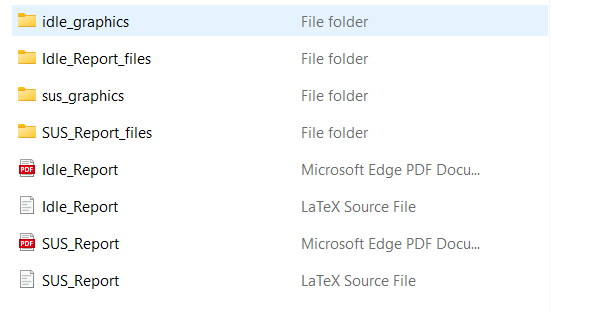
In the artifacts folder, you can see two reports. Idle_Report report is for idle mode, and Sus_Report is for sus mode. You can find the measurement details inside the reports. Other folders includes the artifacts used to create the reports. Check out the Accessing Reports page for detailed report analysis.
Conclusion
By automating the energy measurement process and providing remote access, we make it possible for developers to measure the energy consumption of their software from any location in the world. The increased access to the lab will enable data-driven decision-making for efficiency improvements in code and software eco-certification with agencies like the Blue Angel.
