Kdenlive/Development/ReleaseNotes-18.12: Difference between revisions
| Line 32: | Line 32: | ||
* Faster timeline preview - with support for hardware accelerated encoding | * Faster timeline preview - with support for hardware accelerated encoding | ||
* Improved feedback on move/resize | * Improved feedback on move/resize | ||
* You can now copy / paste timeline clips between different projects (if you have running instances of Kdenlive or after opening a different project) using the standard copy/paste | * You can now copy / paste timeline clips between different projects (if you have 2 running instances of Kdenlive or after opening a different project) using the standard copy/paste | ||
== Project Bin == | == Project Bin == | ||
Revision as of 02:22, 16 February 2019
What kdenlive Refactored version will bring you
That version used to be planned for 18.12 but will more probably be 19.04
A new refactored timeline
Split Audio/Video
We have changed the way timeline tracks work. Each track is now either audio or video, and will only accept audio and video clips respectively.
When dragging an AV clip from the project bin in timeline, the clip will be automatically split, the video part going on a video track, and the audio part on an audio track.
Configurable layout
- Tracks can be resized
- You can switch live between different layouts (audio tracks interleaved with video tracks, or together below the video tracks)
You now have the possibility to move clips and compositions with your keyboard. To do it, select a clip in timeline and use the "Grab Current Item" (Shift+G) function from the Timeline menu. You can then move the item with your arrow keys. Keyframes can also be moved individually. Just click on a keyframe in timeline, then move it left/right with arrows, change its value with + and -. Alt+arrow to go to another keyframe.
Keyframes
Started to improve handling of keyframes:
- you can move a keyframe without altering it's value by using the vertical line that appears when you are above or below a keyframe.
- Move several keyframes by shift-click on the line of a keyframe. All the following keyframes will move with the current one
- Add a new keyframe by double clicking in timeline
- Remove a keyframe by dragging it far above or below the clip limits
Improvements
- configurable thumbnails for each track
- Clip name always displayed when scrolling
- Individual clips can now be disabled (still in timeline but with no audio and no video - works for all clip types)
- Faster timeline preview - with support for hardware accelerated encoding
- Improved feedback on move/resize
- You can now copy / paste timeline clips between different projects (if you have 2 running instances of Kdenlive or after opening a different project) using the standard copy/paste
Project Bin
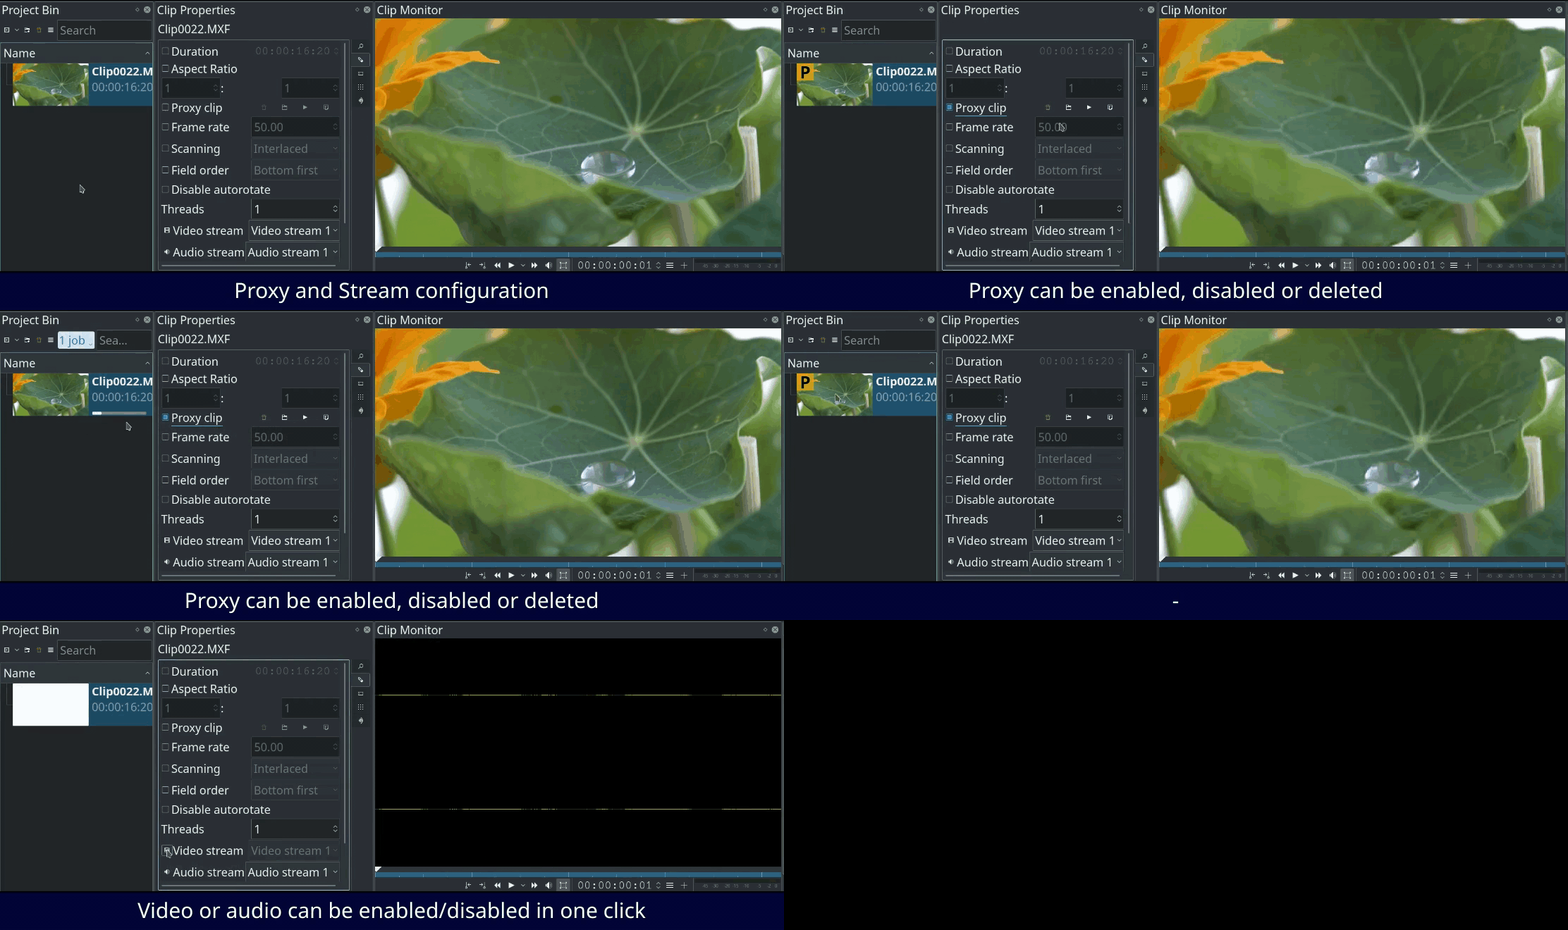
- Improve management of proxy clips (can now be deleted for each clip)
- Shortcut icon to drag only the audio or only the video of a clip in timeline
- Improved management of audio/video streams, also allowing to enable/disable audio or video for a clip
Monitors
- Support multiple guide overlays
- Shortcut icon in clip monitor to drag only the audio or only the video of a clip in timeline
- Support for external monitor display using Blackmagic Design decklink cards
Titler
- Added configurable visual guides
- Visualize missing elements, allowing to move or delete them
Effects and Compositions
- You can now define preferred effects and compositions. These will appear in the timeline context menus and in the effect/composition baskets for easier access
- When dragging a composition from the list into timeline, it will automatically adjust its duration (to fit the entire clip or the duration of a clip overla depending on the context)
Resources
Since a long time, Kdenlive allowed users to download extra user contributes resources from store.kde.org. These download options have now been moved to more logical places instead of the "Settings" menu. Title templates can be downloaded from the Titler dialog, Render profiles from the Render dialog, Luma compositions from the Composition list and Shortcut layouts from the Shortcuts dialog.

